🤗 React组件拖拽改变大小(Resizing)功能
呜呜, CSS有原生的property让div能resize(注意overflow: visible下不奏效). 亏我还自己手动实现, 改了几个月...
为啥要Resizing?
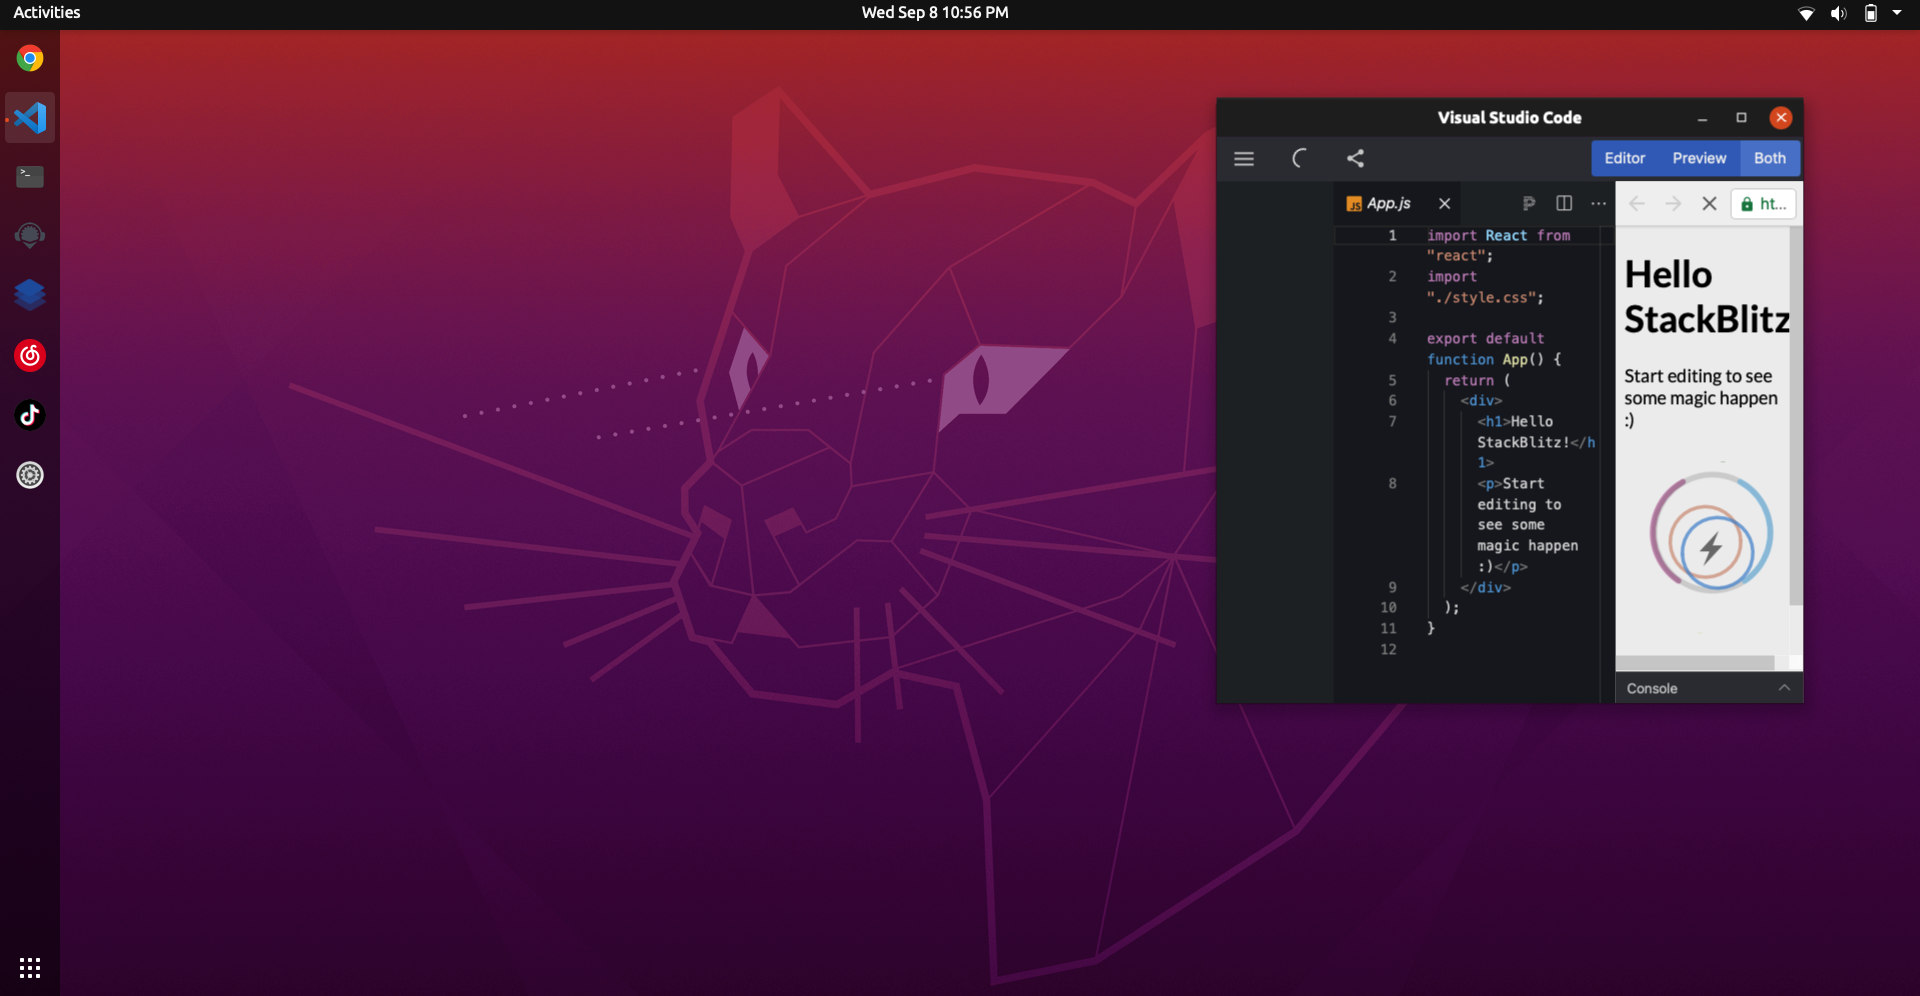
最近在忙一个项目, 区块链的虚拟操作系统. 主要做到的就是把各种区块链的工具集成到一起, 同时做成一个OS的样式, 方便开发者的开发. 基本上长这样:

它的里面有很多小应用(iframe), 基本的全屏和最小化是有的. 但是为了真正方便操作这个OS, 做到应用多开, 我们就得能让窗口能够拖拽放大缩小.
怎么做的
原作者用了react-draggable给应用实现拖拽功能, 查了一圈以后我感觉与其再加一个库或者删了这个库用更全的库, 还不如自己写一下.
除了onclick和onchange, 其实是有无数多事件可以用的. 看了一圈事件以后我发现onmousedown. onmouseup. onmousemove这几个无比符合需求.
关于这个
onmousedown, 我今天看到vscode的开发组19年的博客, 里面就提到了用onmousedown替换onmouseup来提高用户体验. 其实这和我另一篇博客里提到的instant.page有异曲同工之妙.
于是我是这么想的: 拿到鼠标按下去瞬间的位置 -> 拖动时计算位移的距离 -> 给应用加上缩小放大的距离 -> 拿到鼠标放开时的位置.
然后就是这么实现的:
export class Window extends Component {
    constructor() {
        super();
        this.id = null;
        this.startX = 60;
        this.startY = 10;
        // for resizing app function
        this.isResizing = false
        // get browser window size
        this.windowWidth = window.innerWidth
        this.windowHeight = window.innerHeight
        this.beforeResizeMouseX = 0
        this.beforeResizeMouseY = 0
        this.resizeDifferenceX = 0
        this.resizeDifferenceY = 0
        this.state = {
            cursorType: "cursor-default",
            width: 60,
            height: 85,
            closed: false,
            maximized: false,
            parentSize: {
                height: 100,
                width: 100
            }
        }
    }

...

    startResizing = (event) => {
        this.isResizing = true;
        this.beforeResizeMouseX = event.clientX
        this.beforeResizeMouseY = event.clientY
    }

    endResizing = () => {
        this.isResizing = false
    }

    calcResizeChange = (event) => {
        if (this.isResizing) {
            // app size is in percent, so calculate that with window size and multiply a number to make resizing more smooth.
            this.resizeDifferenceX = ((event.clientX - this.beforeResizeMouseX)/this.windowWidth) * 0.8
            this.resizeDifferenceY = ((event.clientY - this.beforeResizeMouseY)/this.windowHeight) * 0.8
            this.setState({width: this.state.width + this.resizeDifferenceX})
            this.setState({height: this.state.height + this.resizeDifferenceY})
        }
    }

    render() {
        return (
            <Draggable>

...

                <div style={{ width: `${this.state.width}%`, height: `${this.state.height}%` }}>
                    <span
                        onMouseMove={event => this.calcResizeChange(event)}
                        // when click on the section, start resizing and get initial mouse position.
                        onMouseDown={event => this.startResizing(event)}
                        onMouseUp={this.endResizing}
                        // when mousedown, start resizing and make <span> cover the whole window.
                        // when mouseup, stop resizing and make <span> back to smaller size.
                        className={
                            (this.isResizing?'fixed h-screen w-screen top-0 left-0 opacity-0':'bottom-0 right-0 w-3.5 h-3.5 absolute')
                            +' z-30'}
                        style={{cursor: 'se-resize'}}
                    >
                    </span>
                </div>
            </Draggable >
        )
    }
}

export default Window
遇到了坑
鼠标太快会离开触发角
🐛: 一开始, 我定了一个小小的触发角, 大概是50px这样, 结果太小了, 鼠标拖太快离开触发角的时候就没法拿到鼠标放开的位置判定结束了.
✅: 修复这个问题就得让鼠标按下去后把触发角直接占满屏幕. 直接让它fixed, 100vw, 100vh.
缩放与变大速度太快了
🐛: 拖的时候因为要无数次渲染, 所以容易渲染速度跟不上, 就会有点卡卡的, 一下子容易拖多或者拖少.
✅: 给"拖动时计算位移的距离"这一步加上一个小于1的比值, 让它慢一点就可以, 或者灵活调整.
应用的大小是用
vw和vh做单位的🐛: 我们在给"应用加上缩小放大的距离"这一步时, 计算出来的差值都是
px的, 没法直接加上去.✅: 处理一下就可以加上去了. 还记得
vw和vh咋计算出来的吗, 给差值除以一个屏幕的大小就可以. 我们在一开始就获取屏幕大小, 然后到时候计算的时候加一个值就好了.
之后的优化
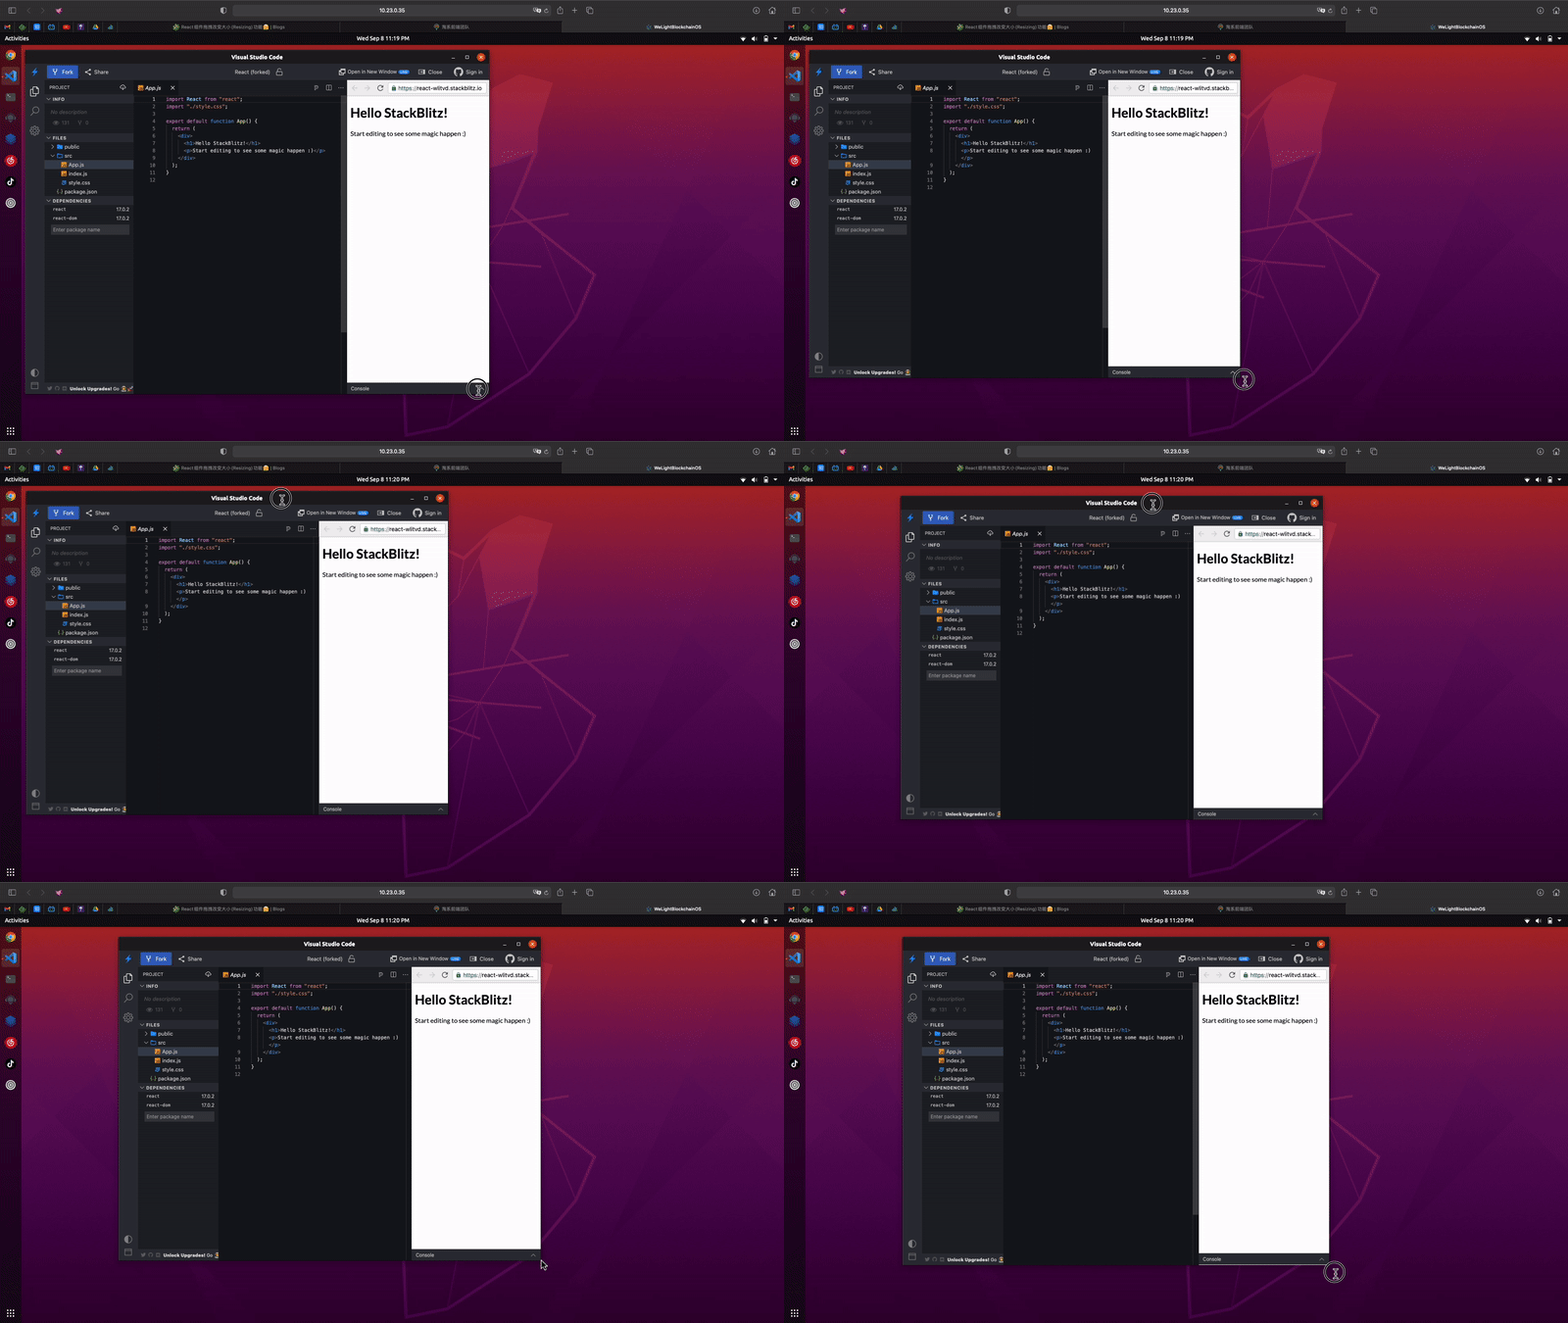
现在的成品是这样的:

虽然有点一般, 但是慢慢拖动还是能用的.
之后有好几个优化的点:
- 找一找有没有HTML原生的解决方案 (还真的有!呜呜)
div {
  resize: both;
  overflow: auto;
  /* overflow不能是visible.. */
}
- 优化并减少渲染次数 (由于用的是类组件, 所以没法用
useCallback, 可以直接简单粗暴随机选择是否渲染...)
calcResizeChange = (event) => {
    if (this.isResizing) {
        this.resizeDifferenceX = ((event.clientX - this.beforeResizeMouseX)/this.windowWidth) * 0.8
        this.resizeDifferenceY = ((event.clientY - this.beforeResizeMouseY)/this.windowHeight) * 0.8
        if (Math.floor(Math.random() * 4) === 0) {
            this.setState({width: this.state.width + this.resizeDifferenceX})
            this.setState({height: this.state.height + this.resizeDifferenceY})
        }
    }
}
- 精读别人写的库, 借鉴过来
有空再做吧...